Pecan Crusted Chicken- Easily Made Gluten Free

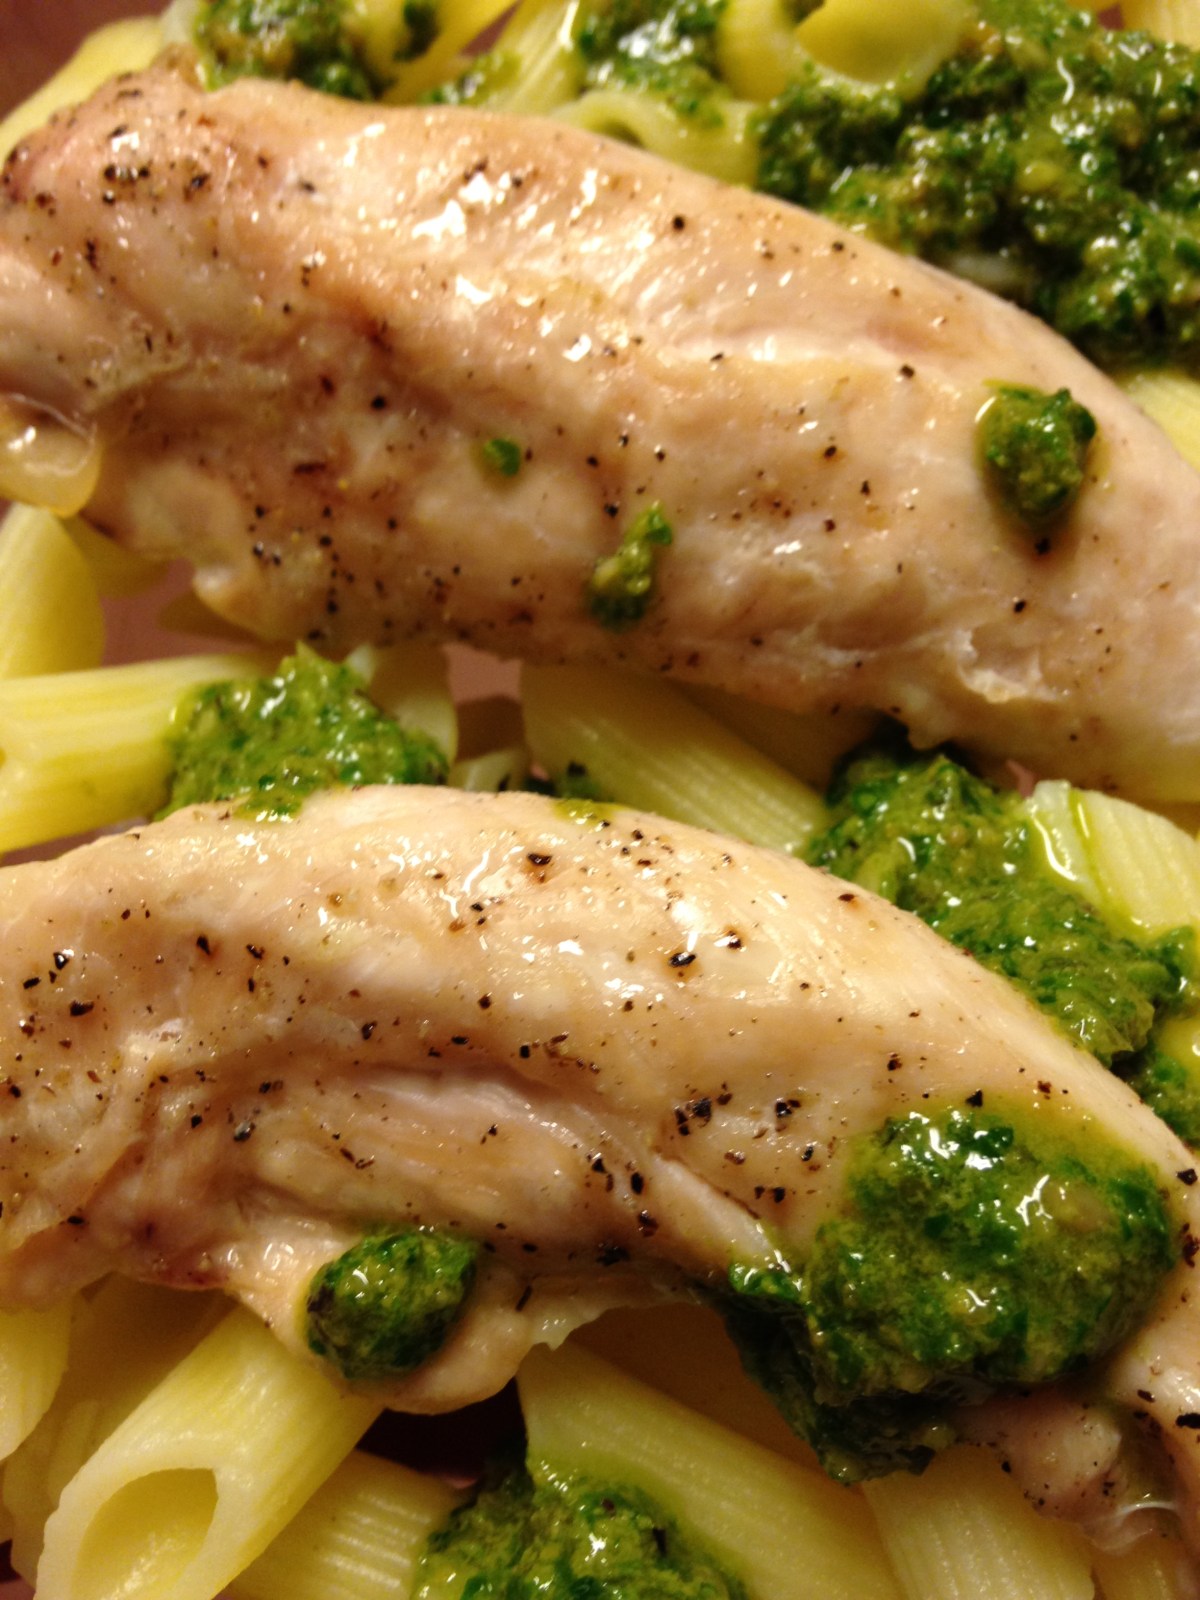
“This needs to go on your blog.” This is what my husband said after he tasted this chicken.  It is surprisingly simple and looks beautiful on a plate.  One of my goals is to make things people want to eat, and I especially like it when I make something that tastes like it came from a restaurant.  This definitely qualifies!


Ingredients:

4 pounds of chicken breast

2 Ener-G eggs (or 2 egg whites)

4 tsp cornstarch

Juice of 1 lemon (save lemon zest)

Oil for frying


Crumb Mixture:

1 c. Rice Chex crumbs or bread crumbs (make sure the bread crumbs are gluten free if you need to be gluten free)

2 T. dried parsley

1 1/2 tsp salt (I use sea salt)

3/4 tsp black pepper

1/4 tsp dried lemon peel (optional, but I used it this time)

zest from the lemon (~1/4 tsp- used in addition to the lemon peel)

3/4 c. finely chopped pecans

1/2 tsp dried oregano

1/2 tsp dried thyme

1/2 tsp paprika

dash of onion powder

dash of garlic powder


Directions:

Cut chicken into pieces the size of the palm of your hand (I cut some of the breasts in half so they wouldn’t be as thick.)

Combine egg, cornstarch, and lemon juice in a shallow dish.

Crumb the Rice Chex in the food processor.  Chop the pecans finely (I used the food processor too). Combine them with all the other ingredients in a shallow dish and stir well.

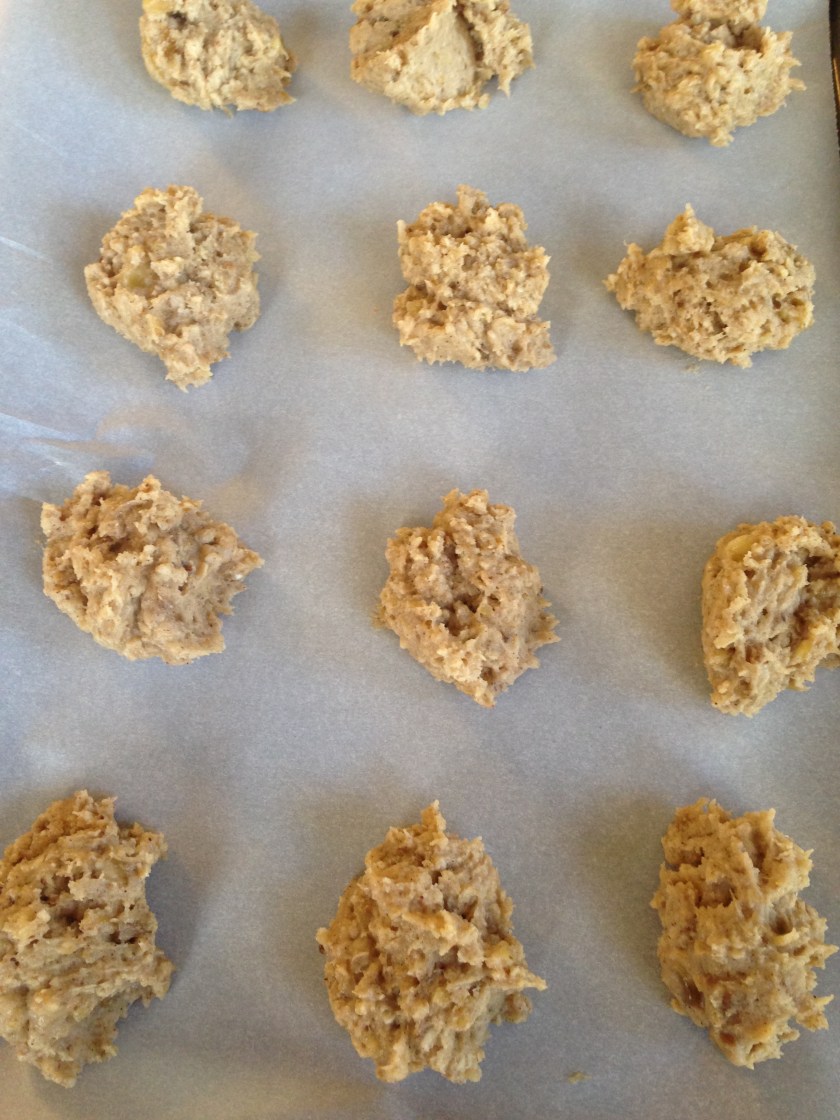
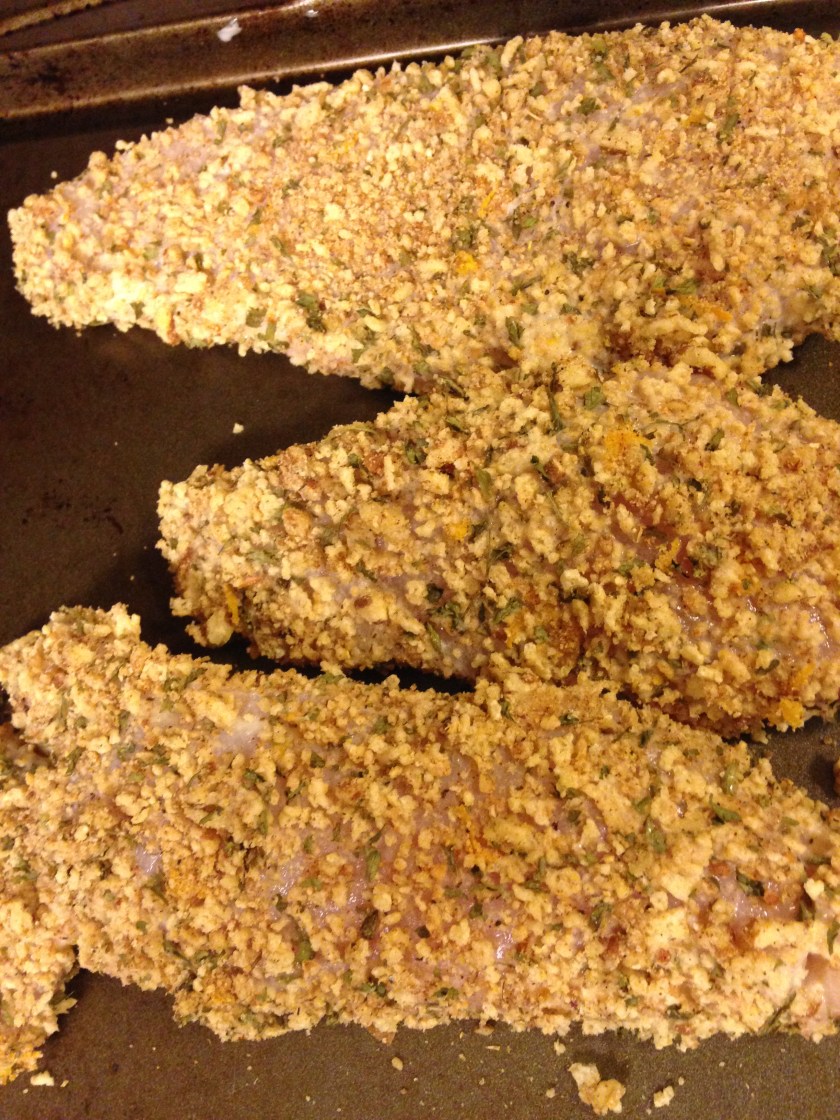
Dip chicken in the cornstarch mixture first and then dip it into the pecan mixture and press the pecan mixture onto the chicken to make sure it is coated well.  Allow to air dry for 20-30 minutes, uncovered (I put it on a cookie sheet and stuck it in the fridge.)  Don’t skip this step or your crumb crust will fall off!

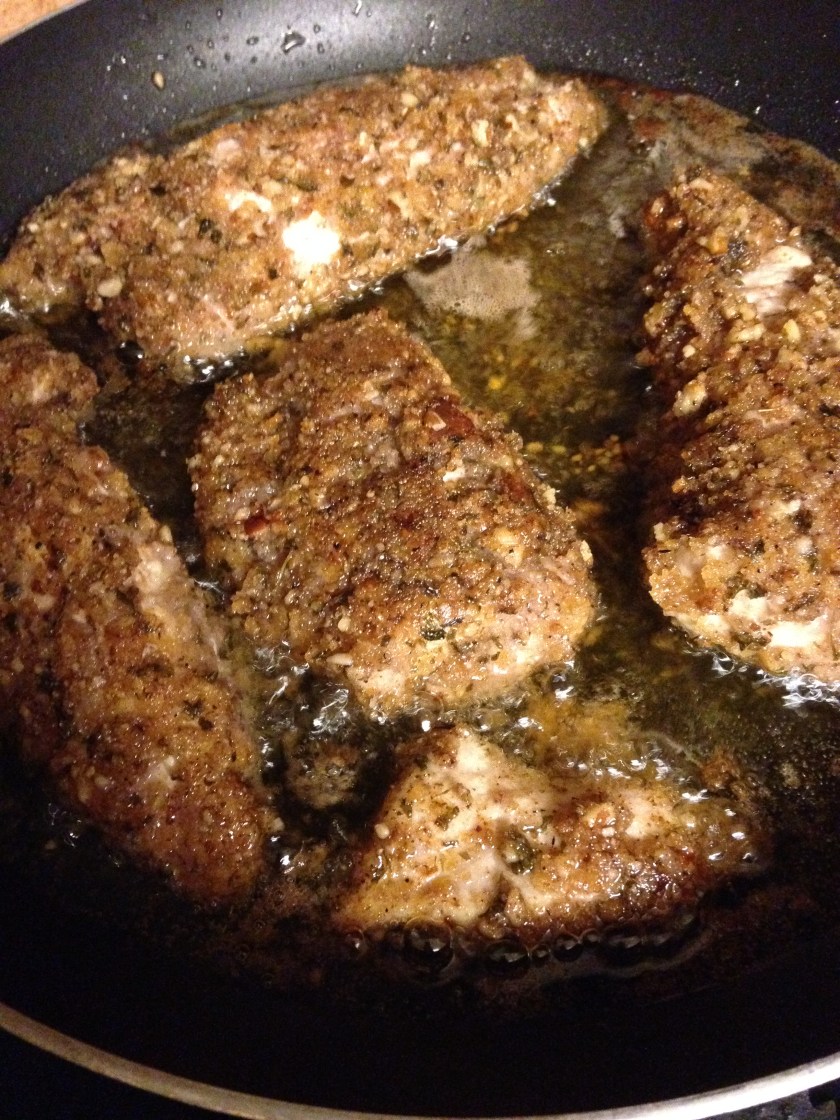
Fill a frying pan to about 1/4 to 1/2 inch deep with oil- I used canola.  Heat oil until it pops when you splash 1-2 drops of water in it.  Be careful and don’t splash yourself!  I use a splatter shield over my pan.  Once oil is hot, fill frying pan with air-dried, coated chicken.  Fry on one side until the edges turn white and the top is starting to change color (maybe 5-7 minutes?) Flip carefully and cook on the other side another 5-7 minutes until chicken is firm when you press on it with a spatula or until it is done when cut through a thick part.  Remove chicken to a plate and allow to rest for 5 minutes before cutting in and enjoying.

To store, I let the chicken cool on plates with the most recently cooked side up.  Store in air-tight containers and microwave to reheat.


IMG_5068.JPG
This is what the crumb mixture looks like.
IMG_5069
First, dip the chicken in the cornstarch mixture.
IMG_5071.JPG
Then dip it in the pecan crumb mixture and press it on so it sticks well.
IMG_5073
This is what it looks like after it has been turned once in the frying pan.
IMG_5074
One piece of pecan encrusted chicken coming right up!

Adapted from: http://www.food.com/recipe/pecan-crusted-chicken-145068

Advertisement

Oreo Buttercream Frosting

I love Oreos.  Unfortunately, they are filled with flour.  On the bright side, several companies have taken up the banner and created gluten free chocolate sandwich cookies.  My personal favorite is Glutino brand because there is no milk in them either.  I have used them for several baking adventures, but I wondered what they would taste like in icing.  I also wanted to quantify a buttercream frosting recipe so that it was repeatable.  In the past, I have just tossed together ingredients and eyeballed the proportions.  The result was always delicious, but the consistency wasn’t as reliable.  Sometimes I got a thin glaze, and sometimes a thick, creamy frosting.  This time I wanted something thick enough that it would hold together a two-layer cake.  Here is my first thick frosting recipe that I am posting on this blog.  I am sure there will be more to come.

Ingredients:

3 1/2 c. powdered sugar

2 T. plus 1 tsp butter (SmartBalance)

1/4 tsp salt

2 T. shortening (I used Spectrum Non-Hydrogenated All Vegetable Shortening.)  You could possibly use all butter.

1 tsp vanilla

5 tsp non-dairy milk, added one at a time until desired thickness.  Can add more if you want it to be less thick.  (I had original Almond Milk today, but coconut milk would work.)

7 crushed chocolate sandwich cookies (I used Glutinos- possibly has traces of egg if you are allergic to eggs)


Directions:

Combine sugar with salt, butter, shortening, and vanilla and combine with a pastry cutter.  Add in non-dairy milk until desired thickness.  I wanted a really thick icing, but you could add more butter and/or milk if you want a thicker, moister frosting.  Mix with a beater to combine well and fluff.  Add in cookie crumbs and stir well.

I doubled my chocolate cake recipe and cooked it in two spring form pans.  I frosted the bottom one and then added the put the second cake on top and continued frosting.


Note:  If you can eat gluten, feel free to use real Oreos for this frosting.  There’s nothing like the original.  I once shared some gluten free chocolate sandwich cookies with a friend.  She said, “They’re good, but there’s something missing and I can’t put my finger on it.”  I said, “It’s wheat.  The flavor you are missing is wheat.”  There is no exact replacement for that flavor, but these other cookies are pretty close, and in a frosting recipe, you really can’t tell.


IMG_5095
I love the look of frosting in a bowl!
IMG_5097
Look how well it stays on the beaters!
IMG_5103
The final product.  Our cake stand from our wedding had the chance to get out and play too.

Inspired by: http://www.food.com/recipe/oreo-cupcakes-with-oreo-buttercream-487608


Blueberry Banana Walnut Pancakes

I used to think that pancakes were best as they were- plain with butter and syrup on top.  My husband has slowly been convincing me that sometimes fruit can be really good when added in.  We decided to make breakfast for dinner and added in not only blueberries, but also walnuts and bananas.  Wow!  He is making a believer out of me. 🙂  This is basically my favorite pancake recipe with some mix-ins.

Ingredients:

Dry ingredients:

2 1/2 c. flour (1 c. brown rice flour, 1/2 c. oat flour, 1/4 c. amaranth, 1/4 c. potato starch, 1/4 c. teff, 1/4 c. tapioca starch, 1/2 tsp xanthan gum)

2 T. baking powder

2 T. sugar

1 tsp salt

Wet ingredients:

2 flax eggs (2 T. golden flaxseed meal combined with 6 T. warm water- let rest for 5 minutes) (or you can use 2 real eggs if you don’t need to be egg free)

2 c. coconut milk (from the carton- I usually use Silk)

1/4 c. oil


Mix-in’s:

5 blueberries per pancake (about 1/4 c. fresh blueberries)

1 ripe banana, diced

1/4 to 1/2 c. chopped walnuts

Directions:

Make the flax eggs and set aside.  Stir together the dry ingredients.  Pour wet ingredients into the dry ingredients and stir together until blended.  Mix with a mixer for about 15-30 seconds to get out any lumps.  Add in chopped walnuts.

Heat griddle until a drop of water sizzles on it.  Add batter by about 1/4 to 1/3 c. at a time depending on what size you like your pancakes.  Drop on about 2 tsp diced bananas and 5 blueberries per pancake.  Flip when the edges are looking firm and it is easy to get a spatula under it.  Cook until that side it done.  Serve with vegan butter and real maple syrup.

Makes about a dozen.

*This recipe is flexible, so you can change up the flour blend if you would like- just make sure to put in some xanthan gum!  As a kid, my mom usually replaced a little bit of all-purpose flour with whole wheat flour, so I usually am trying to imitate that flavor.  Many of the blends in the store are imitating straight up white all-purpose flour.  If that’s the taste you like, a blend from the store may be the perfect thing for you.

Pork Roast

I still get a little nervous when I am feeding more than 2-3 people.  I haven’t had much practice with it and I am always afraid there won’t be enough food.  One way to get over this is to practice having dinner guests.  The real reason we have dinner guests is that we want to get to know them, but the side benefit is I am starting to get a feel for how much food is needed.  This was an eight pound pork roast.  It turned out to be way too much food for us and our dinner guests, but fortunately we live in the modern era and have a freezer.  Some of it has come back out of the freezer already and has been used for carnitas.

This recipe was originally intended for a small pork loin.  I made it for a pot luck once and it was a hit!  This time I decided to try it with this humongous roast.  At $1 a pound, how could I refuse?  The large roast had a mild flavor because the spices had difficulty getting to the middle of the roast, but if you have a small roast or pork loin, it will permeate just fine.  You could probably stand to double the spices if you are using a large roast.  We ate the parts that had been sitting in the juice without adding any sauces or anything.  The middle parts we have been using for other things like BBQ pulled pork and carnitas.  The great thing about cooking is that it is extremely flexible, so you can use this recipe as you wish.


Ingredients:

2-3 pound pork loin or pork roast (can use up to an 8 pound roast)

3 T. lemon juice

3 garlic cloves, minced

1 tsp crushed rosemary (didn’t use the time I took it to a potluck, but I did use it this time)

1 tsp parsley flakes

1/2 tsp thyme

1/4 tsp pepper

1/4 tsp salt


Directions:

Put the loin/roast in a crock pot.  Spread all ingredients on top of the roast and turn to coat (this was impossible with an 8 lb roast, but was easy with a smaller porkloin.)

For a smaller piece of meat, cook on high for 4-6 hours or low for 6-8 hours.  For a larger piece of meat, cook on high for 6-8 hours or low for 8-10 hours.  I cooked mine on high for 8 hours because it was so large.

img_6207


Original recipe: http://www.food.com/recipe/simply-delicious-crock-pot-pork-loin-317045


No-Bake Chocolate Oatmeal Cookies (a.k.a. Dinosaur Food)

I remember making this recipe in junior high with a friend.  At the time we called it dinosaur food, but I have since learned that is has a much less exciting name.  Whichever name you choose to use, this is an easy, quick recipe and relatively inexpensive depending on the ingredients you use.  If you don’t need to be gluten free, you can use regular oats and it is really cheap.  I like Skippy Natural Peanut Butter because it is a compromise between cheap peanut butter and “healthy” peanut butter.  The ingredient list is really short but it still looks and tastes like the peanut butter I remember.  These are all the ingredients you need:

IMG_5033

Ingredients:

1/2 c. butter (one stick)- regular butter or a n0n-dairy butter both work.  I used SmartBalance.

1/2 c. milk (I used coconut milk)

2 c. granulated sugar

1/3 c. cocoa powder

1 tsp. vanilla

1/2 c. peanut butter (could use SunButter or another nut butter if you can’t have peanuts)

2 1/2 c. oats (I used gluten free quick-oats this time but it is good with whole oats too)


Directions:

Mix butter and milk in pan and turn on medium low until butter is partially melted.  Add in sugar and cocoa and mix well.  Bring it to a boil over medium high heat and boil for one minute (I sometimes do 2 minutes.)  Remove from heat and add vanilla and peanut butter and stir until melted.  Add in oats and stir well.  Line a baking sheet with wax paper and drop cookies onto pan by Tablespoons.  Let cool completely and then store in an airtight container.


Chicken Pesto

I found this pesto recipe a few years ago and have made it over and over again with different variations.  When served without chicken, this is a vegetarian and vegan dish.


1/3 c. pine nuts, pumpkin seeds, or sunflower seeds (preferably raw and unseasoned)

2/3 olive oil (this is a great chance to use up extra virgin olive oil if you need to)

5 cloves garlic

1/3 c. nutritional yeast- found in bulk in many stores or in the nutrition department

1 bunch fresh basil leaves

salt and pepper to taste

optional add in: 1-2 handfuls of raw spinach


Directions:

If your pine nuts, pumpkin seeds, or sunflower seeds are raw, toast them over medium heat, stirring constantly, until they start to brown.  Don’t over cook them.

Add all pesto ingredients to a food processor and blend until smooth. Notice if your seed/nuts are already salted and salt accordingly.

Serve over your favorite gluten free noodles and top with baked chicken.


I over-salted my pesto, so I added in some spinach leaves.  It actually gave it a nice color and fixed my salt problem.  It made it so much prettier that I may add some next time just for flair.


Original recipe: http://allrecipes.com/recipe/yummy-vegan-pesto-classico


Banana Oatmeal Walnut Cookies

When my husband arrived home, I had the first batch sitting out.  He tried one and said, “What are these?”  I said, “Banana oatmeal cookies.”  He said, “Wrong.  They’re delicious!”  I said, “Aw!  Your comment may make it on my blog!”  So, there you go.


I have no idea where this recipe came from.  It is an old newspaper clipping glued to an index card.  Sometimes these are the best recipes.


Ingredients:

1 1/2 c. flour (1/2 c. oat flour, 1/2 c. brown rice flour, 1/4 c. potato starch, 1/4 c. tapioca starch, 1/4 tsp. xanthan gum)

1 tsp salt

1/2 tsp baking soda

1/2 tsp nutmeg

3/4 tsp cinnamon

3/4 c. butter or dairy free butter like SmartBalance or EarthBalance

1 c. granulated sugar

1 Ener-G egg or one regular egg or one flax egg (I used an Ener-G egg)

1 c. mashed ripe bananas (about 3)

1 tsp vanilla

1 1/2 c. raw quick-cooking oats

1/2 c. chopped walnuts (optional)

1/2 c. chocolate chips (optional- I didn’t use them)

Directions:

Mix flours, salt, soda, nutmeg, and cinnamon in a small mixing bowl and set aside.

Cream together butter and sugar.  Add egg and vanilla and stir well.  Add in bananas and stir.  Then add flour and oats and mix well.  Finally, add in walnuts and stir.  Mixture will feel wet.  Refrigerate for an hour at least or overnight (this will keep it from spreading all over the place when baked).

Preheat oven to 400 degrees.  Line a baking sheet with parchment paper and drop by teaspoonfuls.  Bake 11-12 minutes or until desired firmness.  Note: These cookies will be softer the next day if stored in an airtight container, so keep that in mind when checking to see if they are cooked.  I like softer cookies, so I’m fine with that, but not everyone does.


Also, I can’t decide which I way I like the flour ingredients written out.  Since most of my recipes are adaptations of non-gluten free recipes, I want them to be legible to people who are just avoiding one or two of the ingredients and not all three.  I am debating between the following two formats.  If you have an opinion, please leave a comment in the comment section (or just tell me if we know each other outside of the internet) so I know which version is easier to read.

Format 1:

1 1/2 c. flour (1/2 c. oat flour, 1/2 c. brown rice flour, 1/4 c. potato starch, 1/4 c. tapioca starch, 1/4 tsp. xanthan gum)

Format 2:

1/2 c. oat flour

1/2 c. brown rice flour

1/4 c. potato starch

1/4 c. tapioca starch

1/4 tsp xanthan gum

IMG_5040.JPG
I have found that using a pastry cutter is a great way to get butter and sugar to start combining.
IMG_5041
There’s just something wonderful about the color of butter and sugar together.  This is one of the reasons I usually use fake butter instead of coconut oil.
IMG_5048
This is how stiff your batter should look after being refrigerated.
IMG_5050
This is what they looked like immediately after taking them out of the oven.

Tachos

This is a taco/nacho mash up.  Apparently it is also a people group in South Sudan, but this post has nothing to do with that.  This is what you get when you make all the ingredients for tacos but all you have sitting around is corn chips.  They’re tacos that you eat like nachos; therefore they are tachos.  The best thing about this “recipe” is that you can totally switch out ingredients according to your preferences.  This is what I used this time:IMG_4939.JPG

This is a great meal to serve if you have people with different allergies/preferences.  They can take what they want and leave the rest.  The most important part is your taco seasoning.  I use Old El Paso’s Original Taco Seasoning.  It has neither gluten nor dairy in it where as many seasonings have one and/or the other.  You could also make seasoning from scratch, but I am making enough things from scratch that this is one of my cheater recipes.


Ingredients:

1 package Old El Paso Original Taco Seasoning

1-2 pound ground beef (omit for vegetarian)

1/2 onion, chopped

2/3 c. water (you can just fill up the seasoning pouch with water and it’s the right amount)

1 package Wholly Guacamole

1 jar Tostitos Salsa (or Pace or any other- just read the label)

1 bunch green onions, chopped (I put the white parts in with the beef so they could cook down some)

2 cups cooked brown rice

1.5 cups cooked black beans

1 bunch chopped cilantro

4 roma tomatoes, chopped

1/2 bag chopped spinach, raw

1 bag corn chips (I use Tostitos, Santitas, HEB, etc.)

1 bag of shredded cheddar cheese (optional if you are not avoiding dairy)


Brown the beef and the chopped onions and white parts of green onions.  Add the seasoning and 2/3 c. water and allow to simmer for 5 minutes.  Chop all of the veggies.

Set everything out buffet style and have people make a bowl of whatever they want in it.  Use the chips to dip the ingredients.

Simple Granola (Mom’s version)

This granola is very addictive.  I usually have to freeze some of it so I don’t continue just eating and eating it.  My friends who have tried it have said they just kept eating and eating it.  There is something very enticing about this recipe and I have yet to find another granola I like better.  I think the fact that it is made mostly of oats, nuts, raisins and honey makes it seem like you should be able to eat lots of it.  It is also way more filling than you think due to the flour in it.  I usually get tricked at least once each time I make it.  I usually eat it like cereal by serving it with coconut milk.  We grew up with this recipe and it was one of the first things I worked on making gluten free.

IMG_4938.JPG

Ingredients:

5 c. oats (I used Bob’s Red Mill Gluten Free Quick Oats)

2 c. brown rice flour (or whole wheat if you are NOT gluten free)

1 c. coconut flakes, sweetened (could switch it out for unsweetened if you want less sugar)

1 c. raisins, plumped (In the past I have also used craisins, dried apricots, dates, or a mixture of all.)

2 c. nuts, chopped (I used half walnuts and half pecans.  You could also use almonds.)

1/2 c. water

1 c. oil

1 c. honey (maybe you could switch it out for something else if you really want it to be vegan)

2 tsp vanilla

1 T. salt


Directions:

Plump the raisins by soaking them in water.  Drain the water when it comes time to use the raisins.

Combine the oats, brown rice flour, and coconut.  Add in the raisins and nuts.  Mix together the water, honey, oil, vanilla and salt and then add to the mixture.  Stir well.

Preheat the oven to 250 degrees.  Grease two baking sheets and then spread out the granola mixture evenly on the two pans.  You may want to wet your hands to help you press it down.

Bake the granola for one hour, stirring every 15 minutes.  It is very important to stir the granola every 15 minutes.  I set the time for 15 minutes and take one baking sheet out at a time.  Each time the timer goes off, I immediately reset it for another 15 minutes.

Allow to cool and then store in an airtight container.  I usually keep it in the fridge or the freezer to extend its shelf life.


Here is a visual of the process:

Double Chocolate Cookies

Double Chocolate Cookies

I let out audible sounds of elation as I bit into my first cookie, mostly in the form of “Mmmm!”  This recipe turned out perfectly!  The dough was just the right texture and the cookies are melt-in-your-mouth.  The ingredients are pretty simple too.  My only complaint is that the batch wasn’t big enough.  I may double it next time.  I think it might also work as a pan of brownies.  I will update when I try that.


Ingredients:

3/4 c. brown rice flour

1/4 c. tapioca starch

1/4 c. potato starch

1/4 tsp xanthan gum

1 tsp baking powder

1/2 tsp salt

2/3 c. cocoa powder

1/2 c. coconut oil, melted but room temperature

1/2 c. granulated sugar

1/2 c. packed brown sugar (I used light brown because that’s what I had)

1 1/2 tsp. vanilla

1/3 c. non-dairy milk (I used unsweetened Cashew Milk this time, but normally I use coconut milk)

1/4 to 1/2 c. Enjoy Life Mini-Chocolate Chips


Directions:

In a small bowl, mix flours and starches, xanthan gum, baking powder, salt, and cocoa powder.  In a stand mixer bowl, mix coconut oil and sugars.  Blend on low.  Add vanilla and blend again on low.  Add half the flour and half the milk and stir just a little bit before turning on the mixer to prevent a flour cloud.  Mix briefly with the mixer.  Repeat with the rest of the flour and milk and mix with mixer briefly.  The dough should be very thick.  Add in chocolate chips.


Preheat oven to 350 degrees.  Meanwhile, form dough into balls and place on parchment paper on a cookie sheet.  Chill the dough balls on the cookie sheet until ready to go into the oven.  Bake for 10 minutes or until desired firmness.  *Note* Coconut oil will harden as it cools, so do not over bake.

This is what they looked like before baking:

IMG_4944.JPG
I saved some of these in the freezer for later for brownie bites!


Adapted from: http://www.twopeasandtheirpod.com/vegan-chocolate-almond-cookies/?m


%d bloggers like this: