Vegan Milk Chocolate Frosting

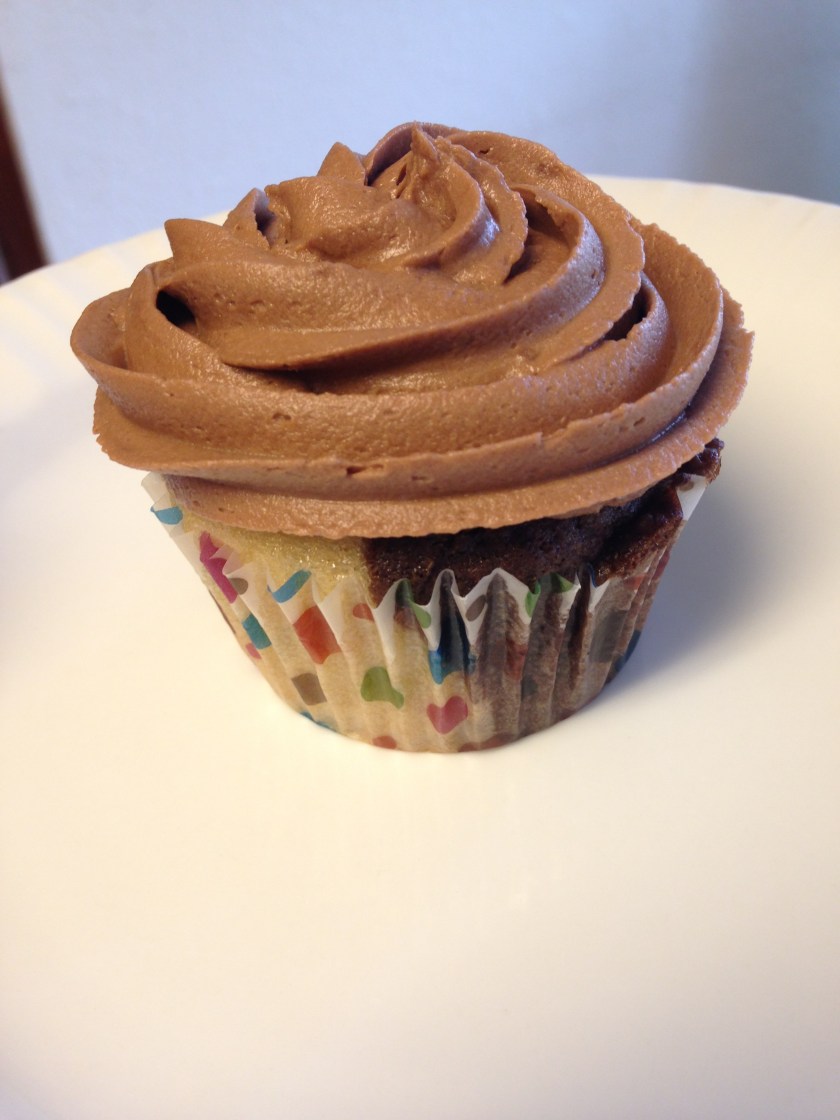
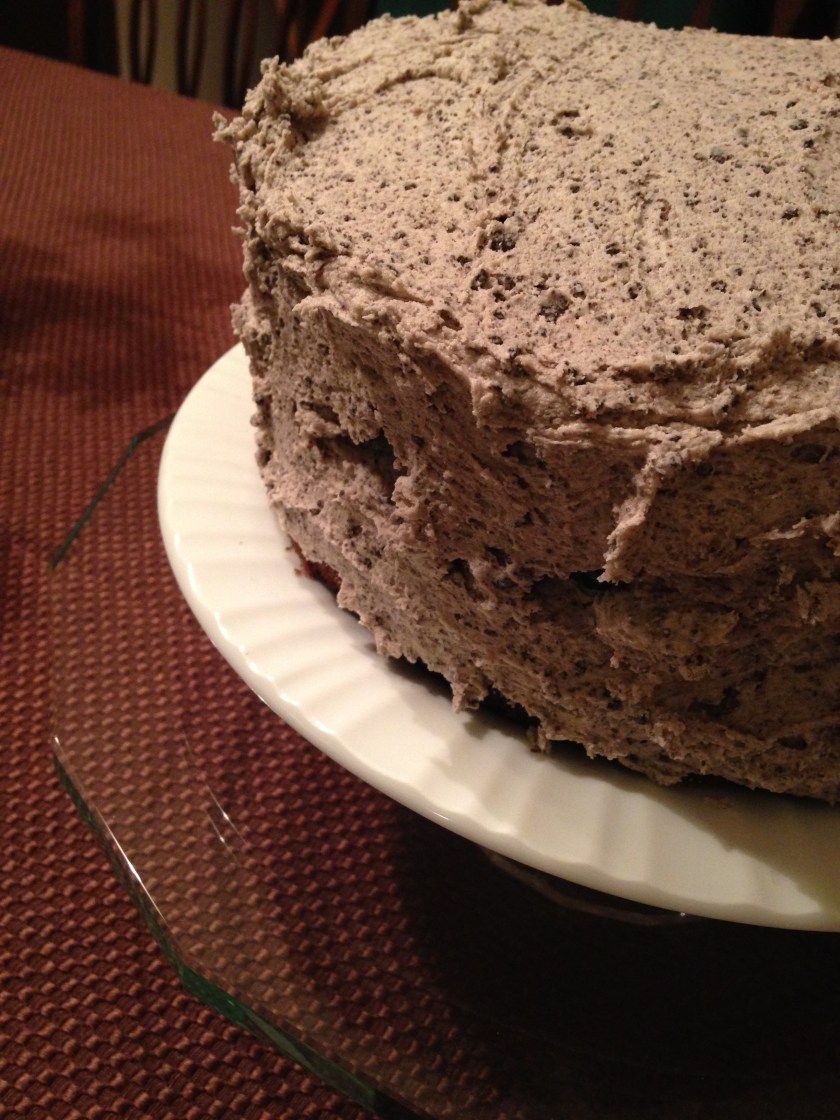
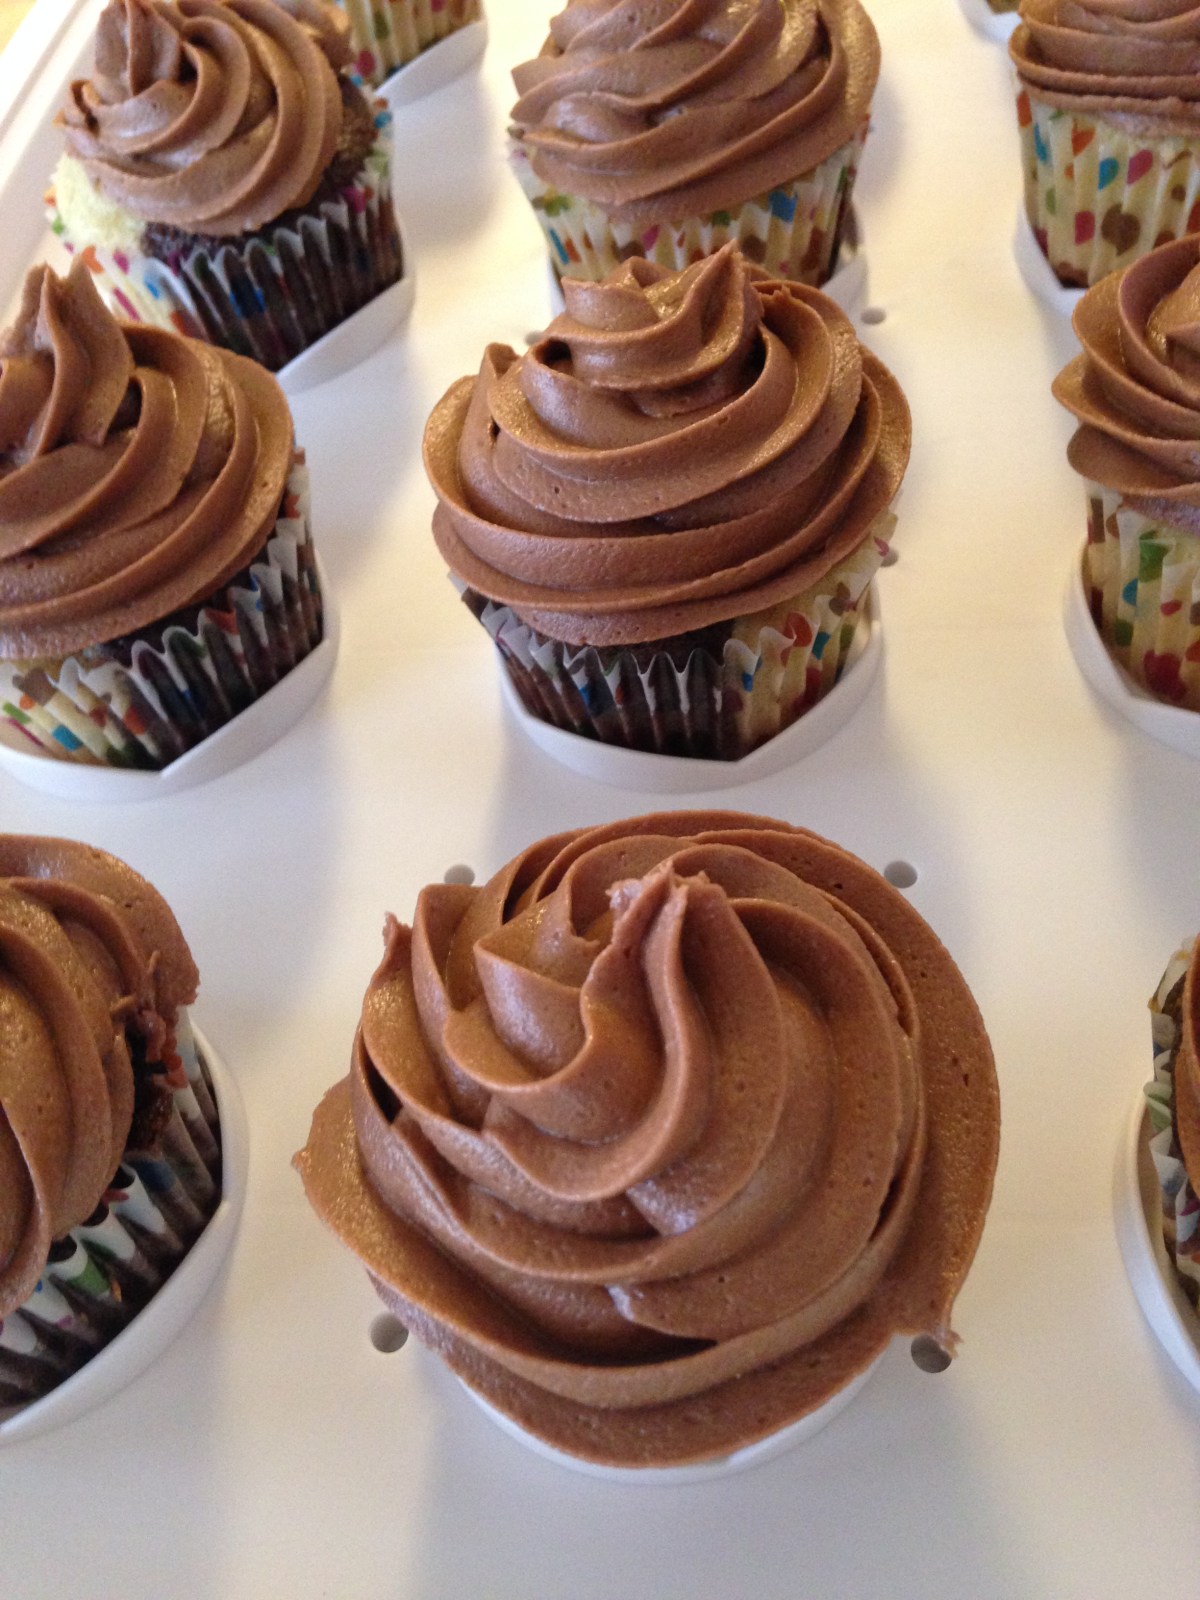
This was my first real attempt at pretty frosting.  I bought an icing decorating kit a few years ago but didn’t have an frosting recipe that was firm enough to use it with.  Not so anymore!  After I made my Oreo frosting, I realized I had a good recipe.  This recipe is almost the same except for no Oreos and it’s a little moister and has cocoa powder.

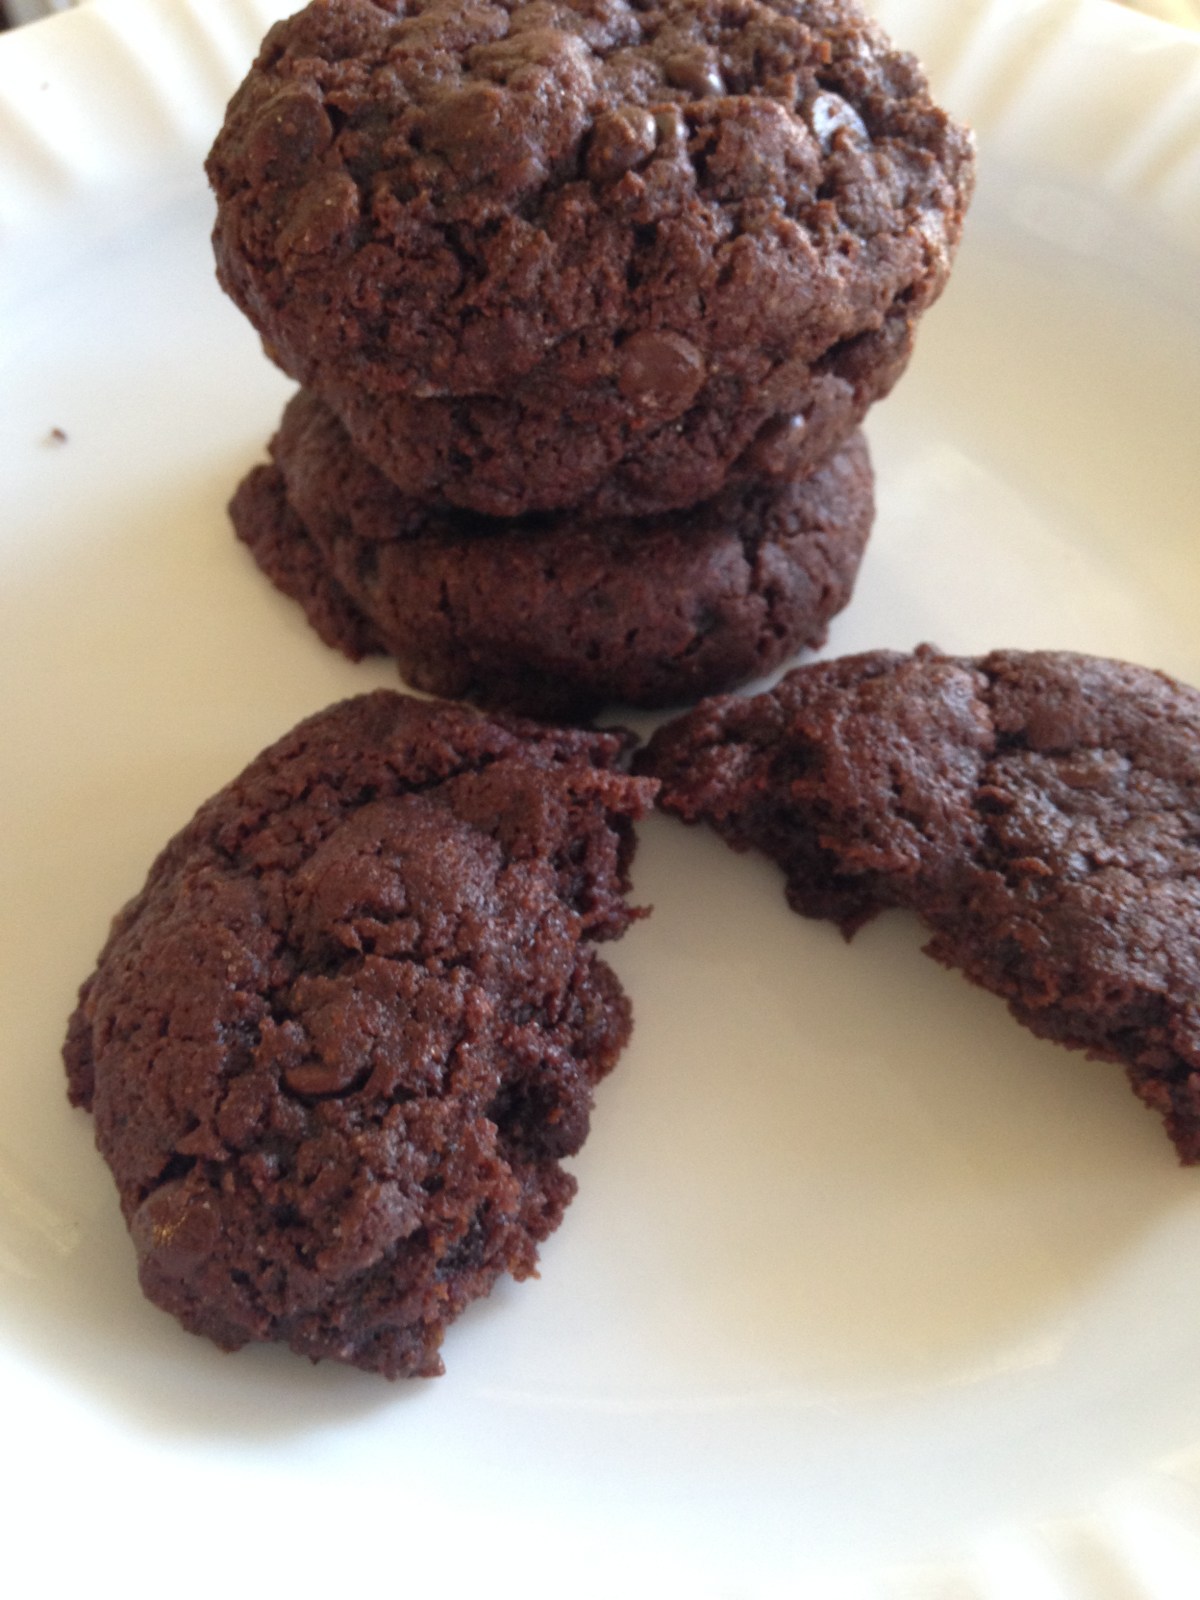
I frosted my Great Divide cupcakes with this frosting.


Ingredients:

3 1/2 c. powdered sugar

1 tsp vanilla

2 T. plus 1 tsp. butter (I used SmartBalance)

2 T. shortening (I used Spectrum.  You could probably use butter instead but it may not hold its shape as well.)

1/4 tsp salt

7 tsp non-dairy milk (I used Silk’s Original Cashew Milk but you could also use coconut or almond)

1/4 to 1/3 c. cocoa powder (depending on how dark you want the chocolate to be)


Directions:

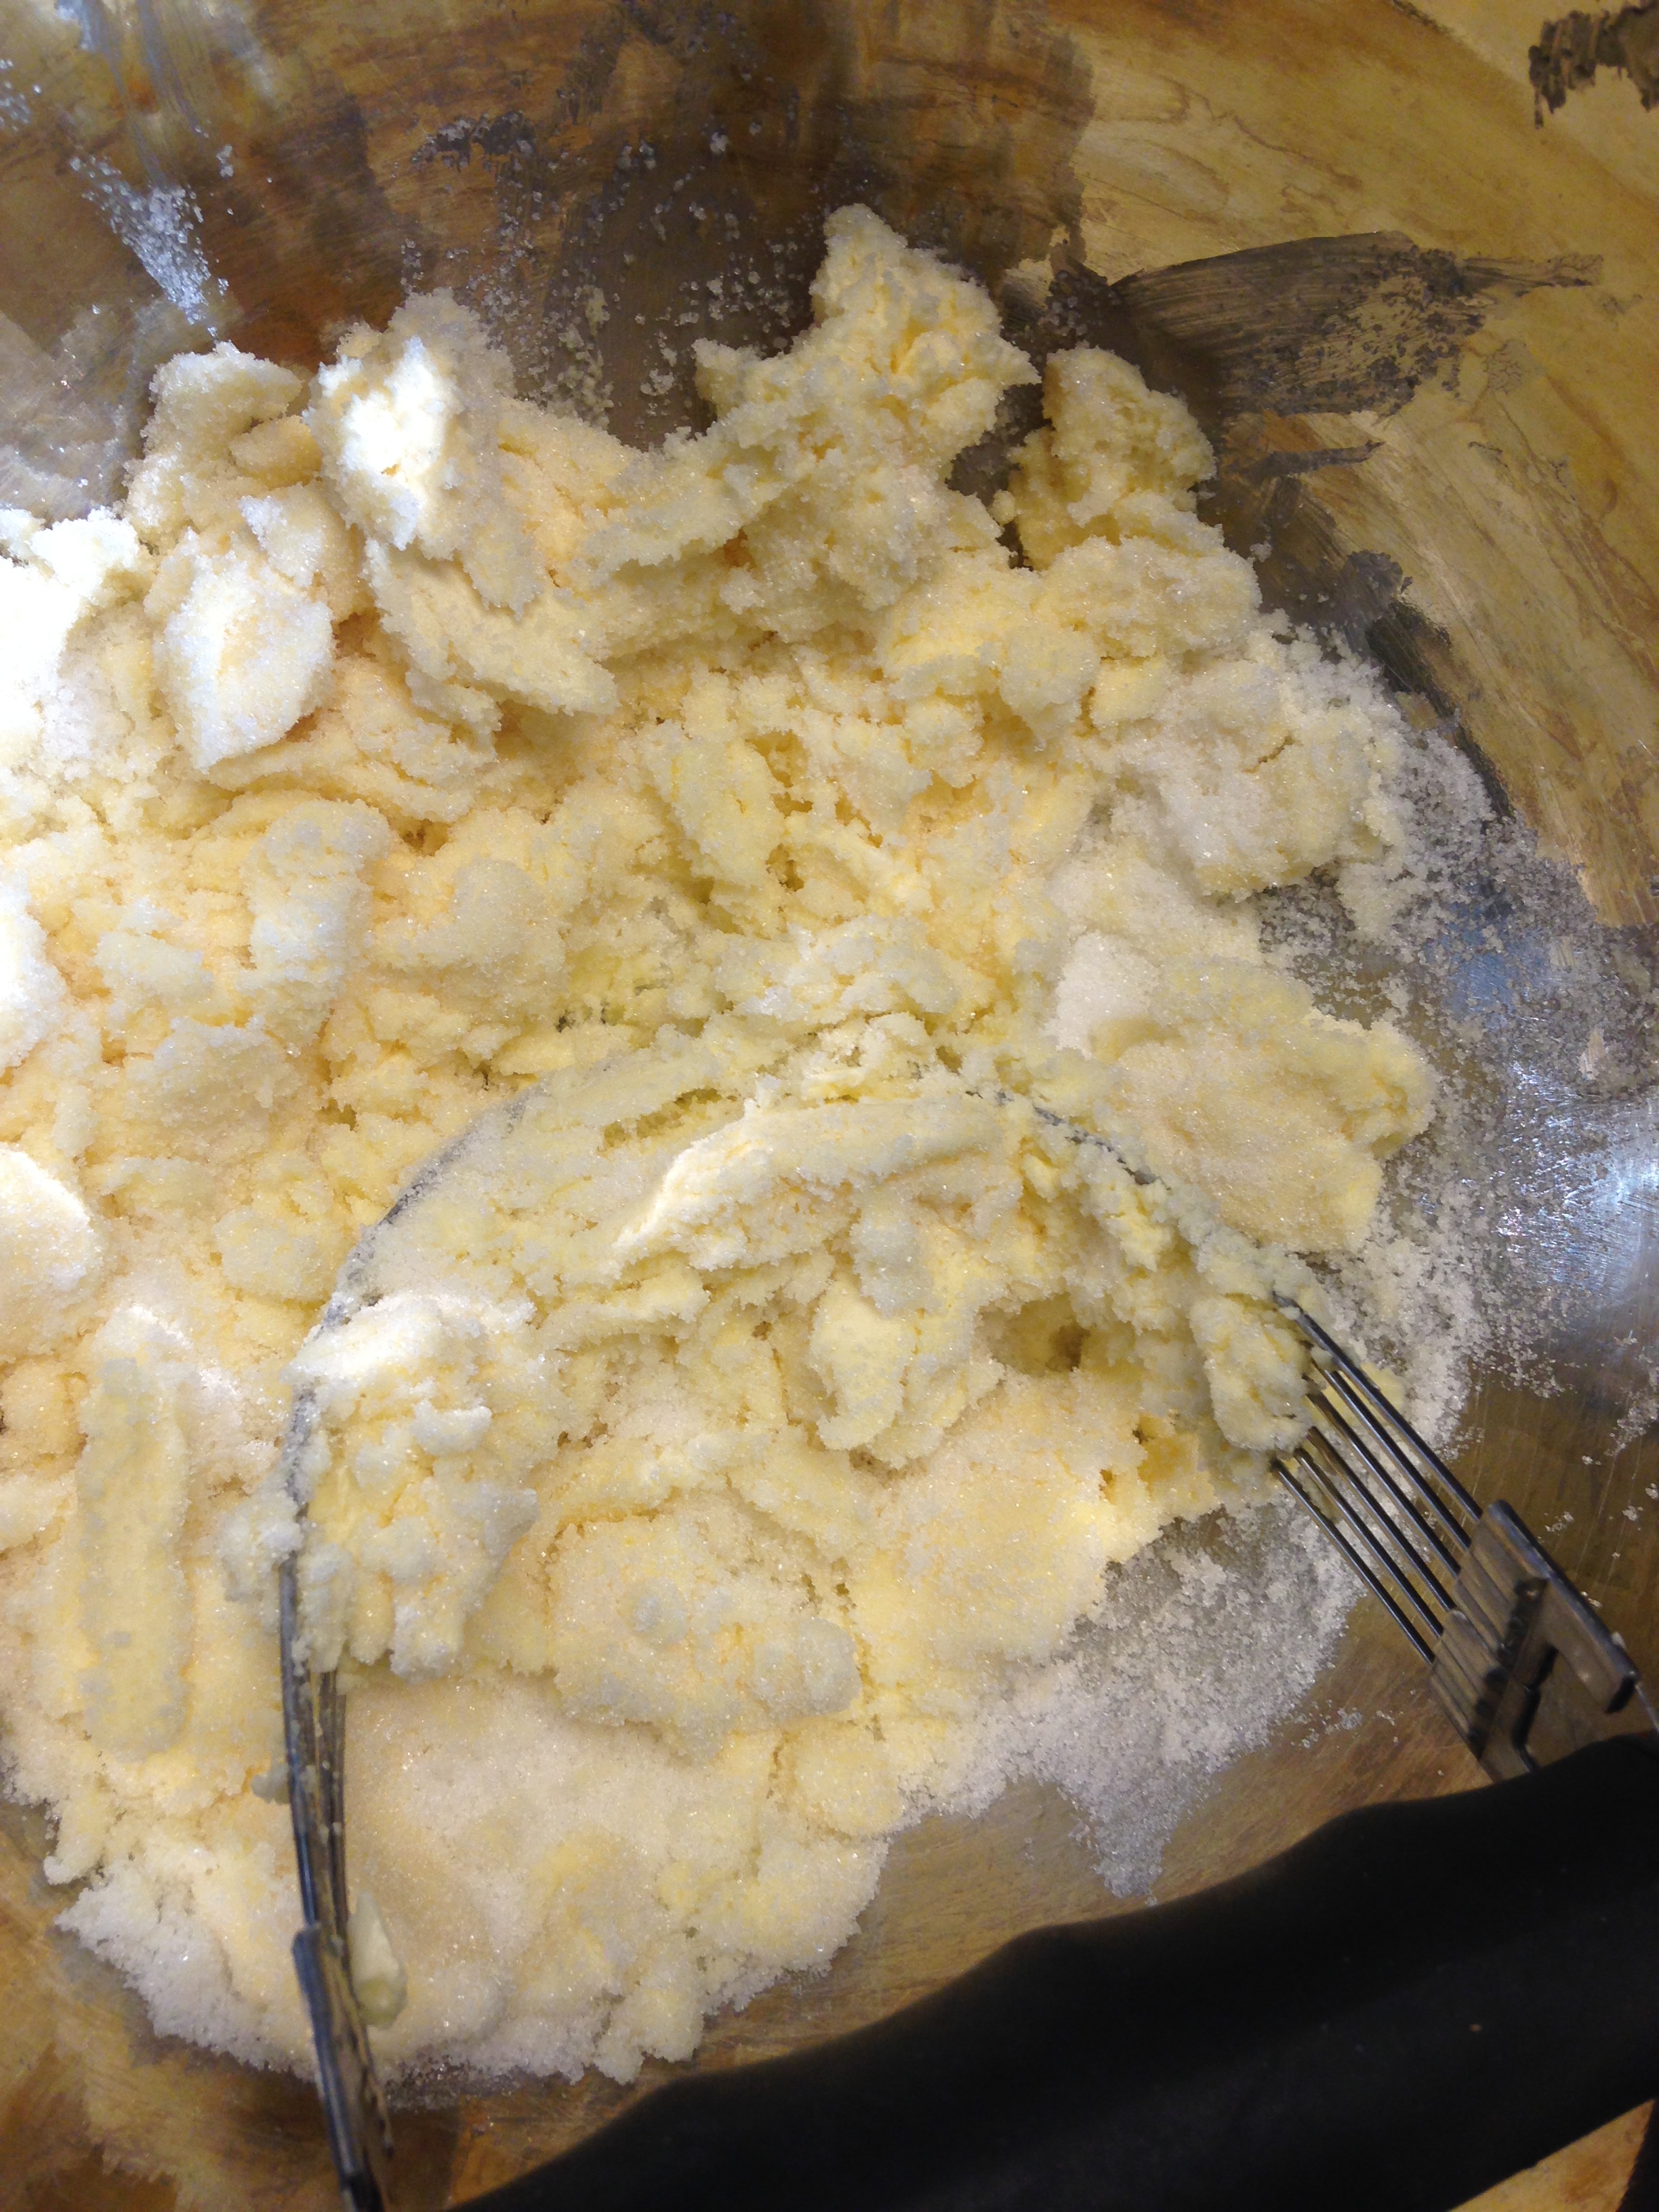
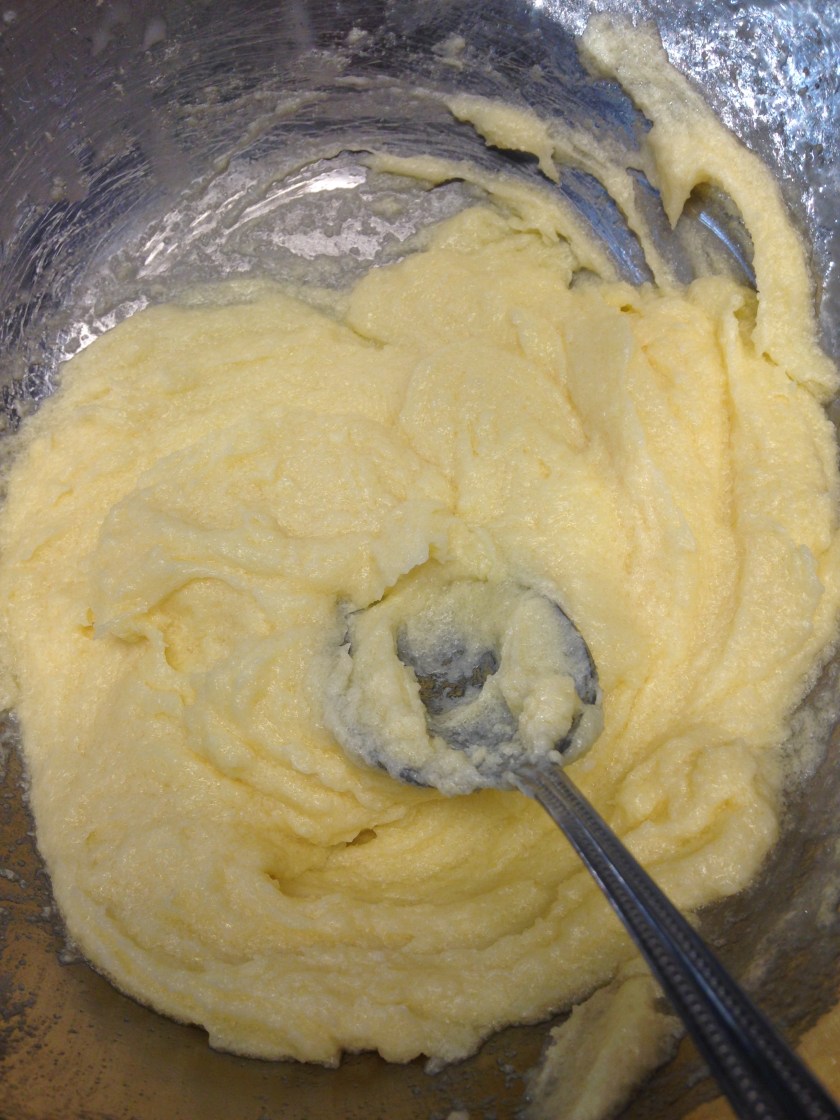
Combine powdered sugar, vanilla, butter, shortening, and salt in a bowl.  Combine with a fork or a pastry cutter.  Add cocoa, starting with 1/4 c.  You can always add more later.  Add non-dairy milk one teaspoon at a time.  You will need at least 4-5, but stir well before adding the last couple.  If your frosting will hold its shape, stop adding liquid.  Mix with a mixer for about a minute to combine well and to add a little fluff.

If you have a cake decorating set, put the frosting in the bag/canister, add your favorite tip, and frost away! If you don’t have a kit but don’t want to just smear the frosting on your cupcakes, you could fill a plastic Ziploc bag with frosting and then cut the tip off of one end and squeeze it out to swirl it on the cupcakes.  Enjoy!

Great Divide Cupcakes

These turned out just like I was imagining them!  The secret is a little tool sold at Bed Bath and Beyond (and probably other places with baking tools.)  See the pictures:


Directions:

1/2 c. coconut oil

1 1/2 c. granulated sugar

3 eggs or egg replacer equivalent to 3 eggs (4 1/2 tsp Ener-G egg replacer and 6 T water or 3 T. ground golden flaxseed and 9 T. water- I prefer flaxseed)

2 tsp vanilla

1 c. brown rice flour

3/4 c. potato starch

1/2 c. tapioca starch

1/2 tsp xanthan gum

1 tsp baking powder

1 tsp baking soda

1/2 tsp salt

1 c. milk (I used coconut milk from a carton)

1/4 to 1/3 c. cocoa powder


Directions:

Melt coconut oil and stir together with sugar in a large bowl.  Add “eggs” and vanilla and stir well.

In a separate bowl, combine dry ingredients except the cocoa powder.

Add the dry ingredients and the milk to the wet ingredients, beginning and ending with the dry ingredients.  I usually give it a quick mix with a mixer just to make sure all those gluten free ingredients are incorporated (about 1-2 minutes).  The last thing you want is a mouthful of unblended rice flour. Separate out half the batter into a different mixing bowl and add 1/4-1/3 c. cocoa powder to one of the bowls.  Mix thoroughly.

Place muffin liners into muffin tin.  Stand the divider in one of the cups and put vanilla cake in one side and chocolate in the other.  I found that about 1 1/2 to 2 T. worked well on each side.  Fill all liners until batter is gone.  If you run out of one, you can just use it to make a single-flavored cupcake.  Bake in preheated oven at 350 degrees for about 18-19  minutes until cake springs back when you touch it.

Cool on a cooling rack and then top with frosting.

Final product when topped with my Milk Chocolate Frosting (posting in 2 days, so come back again!):

IMG_5192.JPG

Oreo Buttercream Frosting

I love Oreos.  Unfortunately, they are filled with flour.  On the bright side, several companies have taken up the banner and created gluten free chocolate sandwich cookies.  My personal favorite is Glutino brand because there is no milk in them either.  I have used them for several baking adventures, but I wondered what they would taste like in icing.  I also wanted to quantify a buttercream frosting recipe so that it was repeatable.  In the past, I have just tossed together ingredients and eyeballed the proportions.  The result was always delicious, but the consistency wasn’t as reliable.  Sometimes I got a thin glaze, and sometimes a thick, creamy frosting.  This time I wanted something thick enough that it would hold together a two-layer cake.  Here is my first thick frosting recipe that I am posting on this blog.  I am sure there will be more to come.

Ingredients:

3 1/2 c. powdered sugar

2 T. plus 1 tsp butter (SmartBalance)

1/4 tsp salt

2 T. shortening (I used Spectrum Non-Hydrogenated All Vegetable Shortening.)  You could possibly use all butter.

1 tsp vanilla

5 tsp non-dairy milk, added one at a time until desired thickness.  Can add more if you want it to be less thick.  (I had original Almond Milk today, but coconut milk would work.)

7 crushed chocolate sandwich cookies (I used Glutinos- possibly has traces of egg if you are allergic to eggs)


Directions:

Combine sugar with salt, butter, shortening, and vanilla and combine with a pastry cutter.  Add in non-dairy milk until desired thickness.  I wanted a really thick icing, but you could add more butter and/or milk if you want a thicker, moister frosting.  Mix with a beater to combine well and fluff.  Add in cookie crumbs and stir well.

I doubled my chocolate cake recipe and cooked it in two spring form pans.  I frosted the bottom one and then added the put the second cake on top and continued frosting.


Note:  If you can eat gluten, feel free to use real Oreos for this frosting.  There’s nothing like the original.  I once shared some gluten free chocolate sandwich cookies with a friend.  She said, “They’re good, but there’s something missing and I can’t put my finger on it.”  I said, “It’s wheat.  The flavor you are missing is wheat.”  There is no exact replacement for that flavor, but these other cookies are pretty close, and in a frosting recipe, you really can’t tell.


IMG_5095
I love the look of frosting in a bowl!
IMG_5097
Look how well it stays on the beaters!
IMG_5103
The final product.  Our cake stand from our wedding had the chance to get out and play too.

Inspired by: http://www.food.com/recipe/oreo-cupcakes-with-oreo-buttercream-487608


Blueberry Banana Walnut Pancakes

I used to think that pancakes were best as they were- plain with butter and syrup on top.  My husband has slowly been convincing me that sometimes fruit can be really good when added in.  We decided to make breakfast for dinner and added in not only blueberries, but also walnuts and bananas.  Wow!  He is making a believer out of me. 🙂  This is basically my favorite pancake recipe with some mix-ins.

Ingredients:

Dry ingredients:

2 1/2 c. flour (1 c. brown rice flour, 1/2 c. oat flour, 1/4 c. amaranth, 1/4 c. potato starch, 1/4 c. teff, 1/4 c. tapioca starch, 1/2 tsp xanthan gum)

2 T. baking powder

2 T. sugar

1 tsp salt

Wet ingredients:

2 flax eggs (2 T. golden flaxseed meal combined with 6 T. warm water- let rest for 5 minutes) (or you can use 2 real eggs if you don’t need to be egg free)

2 c. coconut milk (from the carton- I usually use Silk)

1/4 c. oil


Mix-in’s:

5 blueberries per pancake (about 1/4 c. fresh blueberries)

1 ripe banana, diced

1/4 to 1/2 c. chopped walnuts

Directions:

Make the flax eggs and set aside.  Stir together the dry ingredients.  Pour wet ingredients into the dry ingredients and stir together until blended.  Mix with a mixer for about 15-30 seconds to get out any lumps.  Add in chopped walnuts.

Heat griddle until a drop of water sizzles on it.  Add batter by about 1/4 to 1/3 c. at a time depending on what size you like your pancakes.  Drop on about 2 tsp diced bananas and 5 blueberries per pancake.  Flip when the edges are looking firm and it is easy to get a spatula under it.  Cook until that side it done.  Serve with vegan butter and real maple syrup.

Makes about a dozen.

*This recipe is flexible, so you can change up the flour blend if you would like- just make sure to put in some xanthan gum!  As a kid, my mom usually replaced a little bit of all-purpose flour with whole wheat flour, so I usually am trying to imitate that flavor.  Many of the blends in the store are imitating straight up white all-purpose flour.  If that’s the taste you like, a blend from the store may be the perfect thing for you.

No-Bake Chocolate Oatmeal Cookies (a.k.a. Dinosaur Food)

I remember making this recipe in junior high with a friend.  At the time we called it dinosaur food, but I have since learned that is has a much less exciting name.  Whichever name you choose to use, this is an easy, quick recipe and relatively inexpensive depending on the ingredients you use.  If you don’t need to be gluten free, you can use regular oats and it is really cheap.  I like Skippy Natural Peanut Butter because it is a compromise between cheap peanut butter and “healthy” peanut butter.  The ingredient list is really short but it still looks and tastes like the peanut butter I remember.  These are all the ingredients you need:

IMG_5033

Ingredients:

1/2 c. butter (one stick)- regular butter or a n0n-dairy butter both work.  I used SmartBalance.

1/2 c. milk (I used coconut milk)

2 c. granulated sugar

1/3 c. cocoa powder

1 tsp. vanilla

1/2 c. peanut butter (could use SunButter or another nut butter if you can’t have peanuts)

2 1/2 c. oats (I used gluten free quick-oats this time but it is good with whole oats too)


Directions:

Mix butter and milk in pan and turn on medium low until butter is partially melted.  Add in sugar and cocoa and mix well.  Bring it to a boil over medium high heat and boil for one minute (I sometimes do 2 minutes.)  Remove from heat and add vanilla and peanut butter and stir until melted.  Add in oats and stir well.  Line a baking sheet with wax paper and drop cookies onto pan by Tablespoons.  Let cool completely and then store in an airtight container.


Banana Oatmeal Walnut Cookies

When my husband arrived home, I had the first batch sitting out.  He tried one and said, “What are these?”  I said, “Banana oatmeal cookies.”  He said, “Wrong.  They’re delicious!”  I said, “Aw!  Your comment may make it on my blog!”  So, there you go.


I have no idea where this recipe came from.  It is an old newspaper clipping glued to an index card.  Sometimes these are the best recipes.


Ingredients:

1 1/2 c. flour (1/2 c. oat flour, 1/2 c. brown rice flour, 1/4 c. potato starch, 1/4 c. tapioca starch, 1/4 tsp. xanthan gum)

1 tsp salt

1/2 tsp baking soda

1/2 tsp nutmeg

3/4 tsp cinnamon

3/4 c. butter or dairy free butter like SmartBalance or EarthBalance

1 c. granulated sugar

1 Ener-G egg or one regular egg or one flax egg (I used an Ener-G egg)

1 c. mashed ripe bananas (about 3)

1 tsp vanilla

1 1/2 c. raw quick-cooking oats

1/2 c. chopped walnuts (optional)

1/2 c. chocolate chips (optional- I didn’t use them)

Directions:

Mix flours, salt, soda, nutmeg, and cinnamon in a small mixing bowl and set aside.

Cream together butter and sugar.  Add egg and vanilla and stir well.  Add in bananas and stir.  Then add flour and oats and mix well.  Finally, add in walnuts and stir.  Mixture will feel wet.  Refrigerate for an hour at least or overnight (this will keep it from spreading all over the place when baked).

Preheat oven to 400 degrees.  Line a baking sheet with parchment paper and drop by teaspoonfuls.  Bake 11-12 minutes or until desired firmness.  Note: These cookies will be softer the next day if stored in an airtight container, so keep that in mind when checking to see if they are cooked.  I like softer cookies, so I’m fine with that, but not everyone does.


Also, I can’t decide which I way I like the flour ingredients written out.  Since most of my recipes are adaptations of non-gluten free recipes, I want them to be legible to people who are just avoiding one or two of the ingredients and not all three.  I am debating between the following two formats.  If you have an opinion, please leave a comment in the comment section (or just tell me if we know each other outside of the internet) so I know which version is easier to read.

Format 1:

1 1/2 c. flour (1/2 c. oat flour, 1/2 c. brown rice flour, 1/4 c. potato starch, 1/4 c. tapioca starch, 1/4 tsp. xanthan gum)

Format 2:

1/2 c. oat flour

1/2 c. brown rice flour

1/4 c. potato starch

1/4 c. tapioca starch

1/4 tsp xanthan gum

IMG_5040.JPG
I have found that using a pastry cutter is a great way to get butter and sugar to start combining.
IMG_5041
There’s just something wonderful about the color of butter and sugar together.  This is one of the reasons I usually use fake butter instead of coconut oil.
IMG_5048
This is how stiff your batter should look after being refrigerated.
IMG_5050
This is what they looked like immediately after taking them out of the oven.

Double Chocolate Cookies

Double Chocolate Cookies

I let out audible sounds of elation as I bit into my first cookie, mostly in the form of “Mmmm!”  This recipe turned out perfectly!  The dough was just the right texture and the cookies are melt-in-your-mouth.  The ingredients are pretty simple too.  My only complaint is that the batch wasn’t big enough.  I may double it next time.  I think it might also work as a pan of brownies.  I will update when I try that.


Ingredients:

3/4 c. brown rice flour

1/4 c. tapioca starch

1/4 c. potato starch

1/4 tsp xanthan gum

1 tsp baking powder

1/2 tsp salt

2/3 c. cocoa powder

1/2 c. coconut oil, melted but room temperature

1/2 c. granulated sugar

1/2 c. packed brown sugar (I used light brown because that’s what I had)

1 1/2 tsp. vanilla

1/3 c. non-dairy milk (I used unsweetened Cashew Milk this time, but normally I use coconut milk)

1/4 to 1/2 c. Enjoy Life Mini-Chocolate Chips


Directions:

In a small bowl, mix flours and starches, xanthan gum, baking powder, salt, and cocoa powder.  In a stand mixer bowl, mix coconut oil and sugars.  Blend on low.  Add vanilla and blend again on low.  Add half the flour and half the milk and stir just a little bit before turning on the mixer to prevent a flour cloud.  Mix briefly with the mixer.  Repeat with the rest of the flour and milk and mix with mixer briefly.  The dough should be very thick.  Add in chocolate chips.


Preheat oven to 350 degrees.  Meanwhile, form dough into balls and place on parchment paper on a cookie sheet.  Chill the dough balls on the cookie sheet until ready to go into the oven.  Bake for 10 minutes or until desired firmness.  *Note* Coconut oil will harden as it cools, so do not over bake.

This is what they looked like before baking:

IMG_4944.JPG
I saved some of these in the freezer for later for brownie bites!


Adapted from: http://www.twopeasandtheirpod.com/vegan-chocolate-almond-cookies/?m


Cookie Dough Bites-Egg Free!

I love cookie dough.  I have always loved cookie dough.  That is most of the reason I bake- so I can sample the dough.  I used to eat cookie dough with eggs in it when I ate eggs.  I never had a problem with salmonella, but now that the cookie dough is egg free, there is no cause for concern!


Ingredients:

1 c. coconut oil (I used LouAna brand)

3/4 c. packed light brown sugar

1 c. granulated sugar

2 Ener-G eggs (or 2 real eggs- for 2 Ener-G eggs, mix 3 tsp. Ener-G powder with 4 T. water and let it sit for a few minutes)

1 T. vanilla extract (use the real stuff!)

2 c. brown rice flour

1 c. potato starch (not potato flour!)

1/2 c. tapioca starch

1/2 tsp xanthan gum (this is essential if you want your cookie to stay together)

1 tsp salt (a little less)

1 tsp baking soda

1 cup chocolate chips (I used Enjoy Life Mini Chocolate Chips.)


Directions: Make Ener-G eggs.  Mix together coconut oil and sugars.  Add Ener-G eggs and vanilla and stir well.

Stir together flours (brown rice, potato starch, tapioca starch), xanthan gum, salt, and baking soda.

Add flour mixture into wet mixture in thirds and stirring after each addition.  Stir in chocolate chips.  Form dough into balls and refrigerate or freeze.  If it is too wet to form into balls, refrigerate the dough for an hour and then try again.

After they are shaped, I freeze the dough bites so that I can take them out a few at a time and enjoy.  I have also served them over coconut ice cream.

IMG_4643
Served over ice cream

Pineapple Upside Down Cake

I made this for my sister’s birthday last year.  We were all pleasantly surprised as to how nicely it turned out.  I used the toothpicks to keep the saran wrap off of the glaze in order to transport it and just didn’t think to take a picture before I had put them in.  Enjoy this adaptation of an adaptation of an adaptation!


Ingredients:

Pineapple topping:

1 T. coconut oil, melted

3 T. light brown sugar

1 can of pineapple slices (save the juice-use the kind that is in its own juices, not in heavy syrup)

Cake:

Dry ingredients:

1 2/3 c. flour (approximately 3/4 c. brown rice flour, 1/8 c. millet flour, 1/8 c. amaranth, 1/3 c. tapioca starch, 1/3 c. potato starch, 1/2 tsp xanthan gum)

1/2 c. light brown sugar

1/2 tsp baking powder

1/4 tsp baking soda

1/4 tsp salt

Wet ingredients:

3/4 c. pineapple juice (from the pineapple slice can)

1/2 c. coconut milk (canned)

1/4 c. coconut oil, melted

1 tsp vanilla


Directions:

Brush a 9 inch round cake pan (I used spring form) with the 1 T. coconut oil.  Sprinkle the bottom of the pan with the brown sugar and then arrange the pineapple slices on the pan.  I think I just ate the extra(s) so it would look nice. 🙂

Combine the flour mixture with the other dry ingredients.  In a different bowl, combine the wet ingredients.  Stir the wet ingredients into the dry and mix just enough to make sure it is all combined (you could give it a quick 15 second whirl with the mixer after you have hand mixed it just to make sure).

Pour the batter into the prepared pan and make the top level.  Since I was using a spring form pan, I put the pan on a cookie sheet to catch the drips.  Bake in a preheated 350 degree oven for 30-35 minutes until a toothpick comes out clean.

Once the cake is cooked, allow it to cool for 10 minutes and then remove the edges of the springform pan and flip it onto a plate.  To prevent the cake from breaking, I put the plate on top of the cake and then flipped them over at the same time while pressing them together.

Adapted from: http://www.connoisseurusveg.com/2015/05/vegan-pineapple-upside-down-cake.html

Which was adapted from: http://sallysbakingaddiction.com/2014/03/03/pineapple-upside-cake/

Easy Fudge- Dairy Free!

So, I was shopping the other day and found a new product- sweetened condensed coconut milk!  It looks like this:

IMG_4933

I bought the can without any specific plan in mind, but I knew it would come in handy.  I vaguely remembered avoiding some recipes because I didn’t know how to duplicate sweetened condensed milk.  So one day when my husband was driving home after a long day, I remembered this can and the simple fudge recipe I used in junior high, and I was able to make a quick treat for us.  It is simple and delicious and the texture turned out well- no candy thermometer required!


Easy Dairy Free Fudge

Ingredients:

2 c. chocolate chips (I used Enjoy Life Mini Chocolate Chips)

1 can sweetened condensed coconut milk

1 T. butter (I used SmartBalance)

dash salt

1 tsp vanilla

1 c. chopped walnuts (may omit if desired or may be substituted for other nuts)

Parchment or wax paper


Directions:

Melt chocolate chips and sweetened condensed milk in a saucepan over low heat, stirring constantly.  Once the chips are mostly melted, add the butter, salt, and vanilla.  When the mixture is smooth, remove from heat and stir in the chopped walnuts.

Pour into a wax or parchment paper lined 8×8 pan and allow to cool.  Once it is close to room temperature, you may put it in the fridge to chill.  Once it is chilled, cover and let set for 2 hours or until you are able to cut it with a knife.  Keep refrigerated until ready to serve.  My dairy free and dairy loving friends and family gobbled this up.

IMG_4905


Adapted from: https://www.verybestbaking.com/recipes/28655/easy-chocolate-fudge/