Mint Chocolate Chip Ice Cream

I tried to make mint ice cream awhile back.  I figured since it was green that I needed spearmint extract, right?  Wrong, wrong, wrong.  It’s peppermint extract with green food coloring.  You can skip the food coloring if you don’t want it, but it sure adds to the effect :-).


Ingredients:

3 1/2 c. vanilla non-dairy milk (I used almond milk)

1/2 tub cocowhip (4 oz. total)

1/2 can sweetened condensed coconut milk

2 tsp peppermint extract (add at the end)

4-5 drops of green food coloring

mini chocolate chips or chocolate shavings


Advertisement

Orange Shrimp Scampi

I think this was the best meal I’ve ever made.  Hopefully I codified it correctly so you too can experience it!  I was scraping out all the extra oil in the pan with spaghetti noodles.  Even my toddler loved the flavor!  And to think it came about because my jar of lemon juice had gone bad!  Hence the experimentation with orange juice.


Ingredients:

1 package of gluten free spaghetti (I used HEB brand.)

4 T. olive oil (not extra virgin)

4 cloves garlic, minced (I started using fresh garlic again and it is so much better than the jar!)

1 lb peeled and deveined large shrimp, thawed if pre-frozen

1/4 tsp black pepper

1/2 to 1 1/2  tsp salt (to taste)

4 tsp dried parsley

1/4 c. fresh parsley

1/4 c. freshly squeezed orange juice and juice of 1/2 a lime

1-2 tsp fresh orange zest (I think it was 2)

1/4 orange, thinly sliced in half rounds (I forgot to do this so it is not pictured)

1/8 tsp red pepper flakes


Directions:

Cook spaghetti noodles according to package directions.  Heat oil over medium low heat.  Add the garlic and stir for one minute, then add the thawed shrimp, black pepper, salt, and dried parsley.  Cook until shrimp is pink, about 5-10 minutes.  Remove from heat and add the fresh parsley, orange and lime juice, orange zest, and red pepper flakes.  Stir in the drained spaghetti noodles and then add in the orange slices.

Original recipe: http://www.foodnetwork.com/recipes/ina-garten/linguine-with-shrimp-scampi-recipe3.html

Mexican Pineapple Beef

I loved this dish so much I have already made it twice in the last month.  Once again, it looks super fancy, but it’s relatively simple.

2 pounds sirloin or similar steak, cut into 1 1/2 inch chunks

1 large red bell pepper, cut into 1 inch chunks

3 cups pineapple, cut into 1 inch chunks


Marinade:

3 T. tomato paste

2 T. olive oil

2 T. white wine vinegar

2 T. honey

1 T. gluten free soy sauce (I prefer Kikkoman’s Gluten Free Soy Sauce)

1 tsp. chipotle chili powder

1 tsp ground coriander

1/2 tsp cumin

1/2 tsp fish sauce

1/8 tsp cloves

1 garlic clove, minced

Directions:

Combine the ingredients of the marinade and then stir into the chopped steak, pepper, and pineapple.  Allow to marinate for 4 hours or more in the fridge.

Line two baking sheets with parchment paper.  Bake at 450 degrees for 6 minutes, then stir and drain off excess liquid.  Cook for another 6-9 minutes and drain again.  Take it out of the oven and top with cilantro.  Serve with lime slices.


20180427_202831

Original recipe:

https://thehealthyfoodie.com/sheet-pan-pineapple-beef-mexican-twist/

Sweet Potato Sausage Bake

So, I had a baby! I took almost a year off from updating my recipes, but I plan to start again although at what rate I don’t know.  Anyway, I have been working on finding recipes that don’t take a lot of time because who wants to spend forever in the kitchen when there’s a cute baby around?!  I used to do a lot of stove top meals, but I have recently found myself drawn to oven and crock pot recipes.  That way I can work on them at times that are more convenient.

I found this recipe the other day based on the ingredients I had on hand. It’s tasty and doesn’t have lots of ingredients.

3 medium sweet potatoes, diced into 3/4inch cubes

1medium onion, diced

1 pound ground sausage, pinched into 1 inch pieces

Few dashes salt

Few dashes garlic powder

Olive oil (maybe 1/4cup)

Lightly oil 9×13 glass casserole pan. Toss all ingredients in a large bowl to coat with olive oil. Spread in casserole dish and cover with aluminum foil. Bake at 400 degrees for 45-50 minutes. The original recipe calls for this to be cooked in the crockpot, so that’s an option too.


Original Recipe:

https://blogbydonna.com/slow-cooker-sweet-potato-and-sausage-recipe/


Dairy Free Wendy’s Frosty Copycat

I saw this idea on Pinterest quite some time ago, but I am pregnant and have not been wanting many sweets.  However, my ingredients that I’d purchased when I thought I would want sweets were about to expire, so it was time!  Previously, I had tried a recipe that claimed it tasted like a Frosty.  My first clue that something might go wrong should have been that it called for a banana.  Pretty sure there’s no bananas in a Frosty.  Secondly, the sheer lack of sugar should have been a clue.  Needless to say, that is NOT the recipe I am posting.  This one has three simple, sugary ingredients: sweetened condensed coconut milk, chocolate almond milk, and Cocowhip.  I knew that even if this recipe didn’t exactly mimic a Frosty, it would still be delicious.  I was not disappointed by this recipe!  Not only was it good, but it was like a Frosty with a hint of coconut.  So, break out your ice cream maker and make this recipe!


Ingredients:

1 can sweetened condensed coconut milk (11.25 oz)

1 tub Cocowhip (8 oz), not the lite version

1/2 gallon minus one cup chocolate almond milk


Directions:

Allow Cocowhip to defrost in fridge (takes 4+ hours).  Whisk together sweetened condensed coconut milk, Cocowhip, and chocolate almond milk.  Follow your ice cream maker’s directions.  Mine is a cuisinart and I put it in the pre-frozen bowl and churned it for about 15-20 minutes until it looked like a frosty (see below).  This made two batches in my little ice cream maker.

IMG_7471


Pineapple Fried Rice with Curry

My husband really likes pineapple fried rice.  Any time we go to a restaurant and it’s on the menu, that’s what he orders.  Previously I had made a pineapple fried rice recipe, but I had never tried it in a restaurant.  He said it was good but different than what he was accustomed to.  I finally found a place in Denton, TX that serves a pineapple fried rice that’s gluten free.  I ordered it, of course, and I asked my husband if it tasted similar to the ones he normally ate and he said yes.  So, this is my more accurate version of pineapple fried rice.  The other one is good, but this one is more like it is in the restaurants :-).  I cooked the chicken and rice ahead of time and I already had chopped the pineapple, so this came together really quickly.


Ingredients:

3-4 T. olive oil

1 small onion, sliced

1 red pepper, cut into 1 inch pieces

1/2 c. frozen peas and carrots

1 c. cooked chicken, diced in 1/2 to 1 inch pieces

1-2 tsp curry powder

1 1/2 tsp coriander

6 c. cooked rice (Basmati or Jasmine)- day old preferred, or let it sit out on plates for 1-2 hours beforehand

1 1/2 T. brown sugar

2 1/2 T. gluten free soy sauce (I prefer Kikkoman’s gluten free soy sauce)

1/4 tsp white pepper

2 green onions, diced

1 1/2 c. pineapple, diced

1 c. cashews

1/2 c. raisins

1 medium tomato, diced (optional)

*scrambled eggs can be added if desired


Directions:

Heat olive oil in a large skillet.  Add onions, red pepper, peas and carrots, and chicken and cook for 2-3 minutes.  Add curry powder and coriander and stir until it’s well mixed in.  Cook for another 1-2 minutes.  Add rice and stir until seasoning is mixed well into rice.  Cook for 2-3 minutes more.  Stir together brown sugar and soy sauce and then pour into skillet and stir until rice is coated.  Sprinkle in white pepper and stir to coat.  Add green onions, pineapple, cashews, and tomato.  Add more raisins if desired.  If you can eat eggs, add in some pre-scrambled eggs now.  Cook just until all ingredients are warm- about 3-5 minutes.   Serve and enjoy!


Original recipe:

http://healthynibblesandbits.com/pineapple-fried-rice/


Orange Caper Chicken

This was a quick and easy recipe.  It looks fancy but requires just a few ingredients.

1/2 c. brown rice flour

1/2 tsp black pepper

1/2 tsp salt


4 boneless, skinless chicken breasts, cut in halves or fourths

2 T. olive oil

1 1/3 c. orange juice

1 T. plus 1 tsp orange zest

1/2 tsp salt

1/4 tsp pepper

1/4 c. capers, drained

1/4 c. chopped flat leaf parsley

Rice for serving


Directions:

Mix brown rice flour, 1/2 tsp black pepper and 1/2 tsp salt on a plate.  Dredge chicken pieces in flour mixture and press down a little so the mixture sticks well.


Heat olive oil in a large skillet.  Cook chicken in skillet for 10 minutes per side until chicken is cooked.  Remove to a plate and set aside.

In the same skillet, add orange juice and cook on high until it reduces some- about half.  Stir in orange zest, capers, parsley, and remaining salt and pepper to taste.  Put chicken back in skillet and allow to simmer together for 5-10 minutes.  I think I actually let it sit about 30 minutes because I had dinner ready early, and the flavors blended really well.  I think it will taste just fine if you serve it sooner, but if you need something that you can cook and have waiting, this is a good option!

Serve over brown rice.


Original recipe:

http://allrecipes.com/recipe/34585/orange-caper-chicken/?internalSource=hub%20recipe&referringContentType=search%20results&clickld=cardslot%201


Coffee Crumb Cake

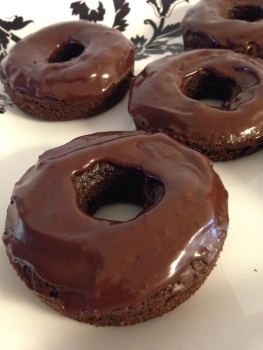
I barely got a picture of this before it was gone!  I was experimenting with a new idea and wasn’t sure if it would turn out or not.  Apparently it did :-).  There is a large amount of sugar and cinnamon in this recipe which makes it delicious, but I do recommend having many mouths to share it with!  I also recommend making it the day before you plan to serve it, and don’t rewarm it before serving it.  I took a bite while it was still warm and thought, “Meh”.  The next morning, however, was a different story.  It was moist and just right.  I took it to a Bible study and it was polished off.  Not only were people happy to eat it, but now I do not have leftovers begging me to overload on sugar!  I would say it’s a win-win. 🙂


Cake Ingredients:

1/2 c. coconut oil, melted

1 1/2 c. granulated sugar

3 flax eggs OR 3 eggs (for 3 flax eggs, add 9 T. water to 3 T. golden flaxseed meal in a small bowl and let it sit for 5 minutes)

2 tsp vanilla (I used Mexican vanilla)

1 c. brown rice flour*

3/4 c. potato starch*

1/2 c. tapioca starch*

1/2 tsp xanthan gum*

1 tsp baking powder

1 tsp baking soda

1/2 tsp salt

1 c. non-dairy milk (I used Silk Almond Milk- unsweetened this time)


Filling Ingredients:

3 T. butter, softened (I used EarthBalance Vegan Buttery Sticks)

1 T. cinnamon

1/2 c. brown rice flour

1/2 c. packed brown sugar


Topping Ingredients:

5 T. butter, softened (I used EarthBalance Vegan Buttery Sticks)

3/4 c. brown rice flour

1/2 c. packed brown sugar

1 T. cinnamon


Directions:

Cake: Set out butter so it can soften.  Preheat oven to 350 degrees Fahrenheit.  Make the flax eggs and set aside.  Cream melted coconut oil and granulated sugar in a large bowl.  Add in flax eggs (or regular eggs) and vanilla.  Stir well.  In a separate bowl, combine dry ingredients (brown rice flour, tapioca starch, potato starch, xanthan gum, baking powder, baking soda, and salt).  Add the milk and the flour mixture to the wet ingredients, beginning and ending with the flour mixture.  Pour half of the mixture into a greased 8×8 pan (pour in 2 cups and reserve 2 cups).

Filling:  In a small bowl, combine all filling ingredients.  I used a pastry cutter to mash the butter into it until it was all mixed and crumbly.  Sprinkle evenly over the cake batter in the pan, trying not to disturb the bottom layer.  Pour the rest of the batter (the remaining 2 cups) into the cake pan, but be gentle so you don’t disturb the filling layer.

Topping: In a small bowl (can be the same bowl used for the filling), combine the butter, brown rice flour, sugar, and cinnamon.  Use the pastry cutter again to cut in the butter until it’s all mixed and crumbly.  Sprinkle the topping over the top of the cake.  Gently press down on the topping with flat hands to help it stick to the cake.

Bake for 50-60 minutes in an oven preheated to 350 degrees Fahrenheit.  Cake is done when a toothpick inserted near the middle comes out clean (it will probably have some cinnamon crumbles on it, but it shouldn’t have any wet batter on it).  I cooked mine for the full 60 minutes, but I was checking it every 5 minutes beginning at about 40 minutes.

I was nervous that the cake was going to spill over the edges of my pan, so I put a thin aluminum cookie sheet under it.  It turned out to be unnecessary, but if you think your dish is shallower than an 8×8 Pyrex, then you might want to do this.  Another option is to use a 9×9 pan so your cake has a little more room to grow.  If you do so, you may need to bake it for a little less time.

*If you want to make this so it has all-purpose flour instead of being gluten free, you should be able to replace the flours, starches, and xanthan gum with equal amounts of all-purpose flour.  I haven’t actually tried this, but normally these recipes have been converted from a flour recipe.  Let me know if you try it and what the results were!


Original recipes:

https://www.gogogogourmet.com/cinnamon-coffee-cake-with-streusel-crumb-topping/

http://glutenfreehomemaker.com/gluten-free-yellow-cake-recipe/

Chickpea and Kale Curry

We grew a garden this year and our kale has been doing really well.  Now we are faced with the problem of how in the world to use it all…


This is a nice and easy vegetarian meal if you like yellow curry and you have kale you need/want to use.  🙂


Ingredients:

2 T. olive oil

1 T plus 1/2 tsp curry powder

1 c. onions, diced

2 garlic cloves, minced

1 1/2 c. kale, stems removed and chopped

1 can coconut milk (13.5 oz)

2 cans garbanzo beans, drained (you may use just one can if you prefer- I actually cooked mine from dry beans in the crockpot the day before but cans work just fine)

1/2 c. tomato sauce

1 tsp sugar

dash salt

4 tsp lemon juice

Rice for serving


Directions:

Heat oil in a skillet on medium/medium high.  Add curry powder and cook while stirring for 1-2 minutes until aromatic.  Add onions, garlic and kale and cook until onions are clear (about 2-3 minutes).  After that, add the coconut milk, garbanzo beans, tomato sauce, salt, and sugar.    Stir it all together and then allow it to simmer for 5 minutes or so.  I served mine over brown rice.


Original recipe:  http://www.alaskafromscratch.com/2015/12/29/chickpea-curry-with-kale

Salmon Macaroni Salad

This made a great afternoon snack and would also be a great picnic item.


Ingredients:

1/2 c. dry macaroni noodles (I used HEB gluten free)

2 small cans of boneless salmon (6-7 oz each)

1/2 c. vegan mayonnaise (or more)

1 tsp mustard

1 tsp lemon zest

1 T. lemon juice

1/3 c. finely minced onion (I used red onions, but you could use regular or green onions)

2 T. chopped fresh parsley

1 T. chopped fresh dill (or 1/2 tsp dried dill)

2 stalks celery, chopped

Black pepper to taste

Tabasco sauce, optional (I didn’t use it)


Directions:

Boil the macaroni as per the package directions.  Add 1 T. salt to the water after it is boiling.  While macaroni is cooking, prepare the rest of the salad.

Mix the salmon with the mayonnaise, mustard, lemon zest, and lemon juice.  Add in the onions, parsley, dill, and celery.

Once the pasta is cooked, drain it and add it to the salad while the pasta is still warm.  Season with salt, pepper, and Tabasco sauce (if using).

Refrigerate for at least an hour or two before serving.  Should be served cold.  As it sits in the fridge, it may absorb the liquid, so more mayonnaise may be added to keep it creamy.

Original recipe:

http://www.simplyrecipes.com/recipes/salmon_macaroni_salad/

%d bloggers like this: